How to Clean Your Engine Bay Safely: Expert Guide 2024 A clean engine bay is more than cosmetic. Regular cleaning helps you spot fluid leaks early, improves cooling efficiency by removing heat-trapping grime, and significantly boosts resale value. Yet many car owners hesitate to clean under the bonnet, worried about water damage to electrics or voiding warranties. This comprehensive guide explains exactly how to safely clean your engine bay without risk, what products to use, which components to protect, and when to call a professional. Whether you drive a modern hybrid in London or an older diesel, these methods apply.
Why clean your engine bay? Before diving into technique, understand the practical benefits: Early leak detection: Oil, coolant, and brake fluid leaks show clearly against a clean engine block. On a greasy engine, small leaks go unnoticed until they become expensive problems. Better cooling: Dirt and oil buildup on the engine block, radiator, and intercooler act as insulation, reducing heat dissipation. Clean components run cooler, especially important during London's increasingly warm summers. Improved resale value: A grimy engine bay signals poor maintenance to potential buyers. A detailed engine compartment suggests careful ownership and can add hundreds to your asking price. Easier maintenance: Mechanics charge less diagnostic time when they can actually see components. A clean bay makes DIY oil changes and fluid checks simpler. Rodent deterrent: Mice and rats nest in dirty engine bays, attracted by food residues and warmth. They chew wiring harnesses, causing thousands in damage. Clean bays offer less shelter.
Safety precautions before you start Engine bay cleaning involves water, electricity, and chemicals. Follow these non-negotiable safety rules: Let the engine cool completely: Wait at least two hours after driving. Hot components can crack when hit with cold water. Burns are also a risk. Disconnect the battery: Remove the negative terminal first (black cable) to prevent short circuits. Modern cars have sensitive electronics that don't tolerate voltage spikes. Never use a pressure washer: High-pressure water forces moisture past seals into alternators, fuse boxes, and ECUs. Use gentle stream from a hose or pump sprayer only. Protect sensitive components: Cover the alternator, air intake, fuse boxes, and any exposed electrical connectors with plastic bags secured with tape or elastic bands. Work in a well-ventilated area: Degreasers emit fumes. Outdoor cleaning is ideal. If working in a garage, ensure doors and windows are open. Wear gloves and eye protection: Degreasers are alkaline and can irritate skin. Splashes during rinsing can reach your face. Check your warranty: Some manufacturer warranties contain clauses about engine washing. When in doubt, consult your handbook or dealer.
What you'll need Gather these supplies before beginning:
Cleaning products
-
Engine degreaser: Choose a dedicated automotive degreaser, not kitchen cleaner. Water-based formulas are safer for rubber hoses and plastic covers than petroleum-based solvents
-
Soft brushes: Various sizes including a detailing brush for tight spaces, a larger brush for plastic covers, and an old toothbrush for small components
-
Microfibre cloths: Several clean, lint-free cloths for wiping and drying
-
All-purpose cleaner: Diluted solution (1:10 with water) for light grime on plastic covers
Protection materials
-
Plastic bags or cling film
-
Tape or elastic bands
-
Old towels (to catch drips)
Equipment
-
Garden hose with adjustable nozzle (gentle shower setting)
-
Pump sprayer (optional but gives better control than a hose)
-
Air compressor or leaf blower (for drying)
Step-by-step engine bay cleaning process
Step 1: Preparation and masking Open the bonnet and inspect the engine bay in daylight. Identify components that must stay dry- Alternator
-
Battery terminals and fuse boxes
-
Air intake and filter housing
-
Exposed sensors and electrical connectors
-
ECU (engine control unit) Cover these with plastic bags secured with tape. Don't skip this step. Water ingress into an alternator can cost £300-800 to replace. Remove any loose debris by hand: leaves, twigs, dirt accumulation around the windscreen base. In London, you'll often find surprising amounts of organic matter if you park under trees.
Step 2: Apply degreaser Spray degreaser generously on the engine block, valve covers, and any heavily soiled areas. Avoid spraying directly onto covered electrical components. Read the product instructions for dwell time, typically 3-5 minutes. This allows the degreaser's surfactants to break down oil and road grime. For stubborn deposits (common on older engines or those that have leaked oil), agitate with a brush while the degreaser is still wet. Use the detailing brush to work into crevices around bolt heads and hose connections.
Step 3: Rinse thoroughly Set your hose nozzle to a gentle shower or mist setting. Never use a jet stream. Rinse from top to bottom, allowing gravity to carry dirty water downward and out of the engine bay. Take your time. Rushing this step leaves degreaser residue that attracts dirt. Pay attention to the underside of the bonnet and the bulkhead (the vertical panel at the back of the engine bay). These areas accumulate grime but are often missed. If you're using a pump sprayer instead of a hose, you'll have more control over water volume and placement. This is ideal for anxious first-timers.
Step 4: Repeat on stubborn areas Inspect your work. If oil stains remain, apply a second round of degreaser to those specific spots, agitate with a brush, and rinse again. Don't expect a 20-year-old engine to look showroom-new. Permanent staining is normal. Focus on removing loose grime and oil, not achieving perfection.
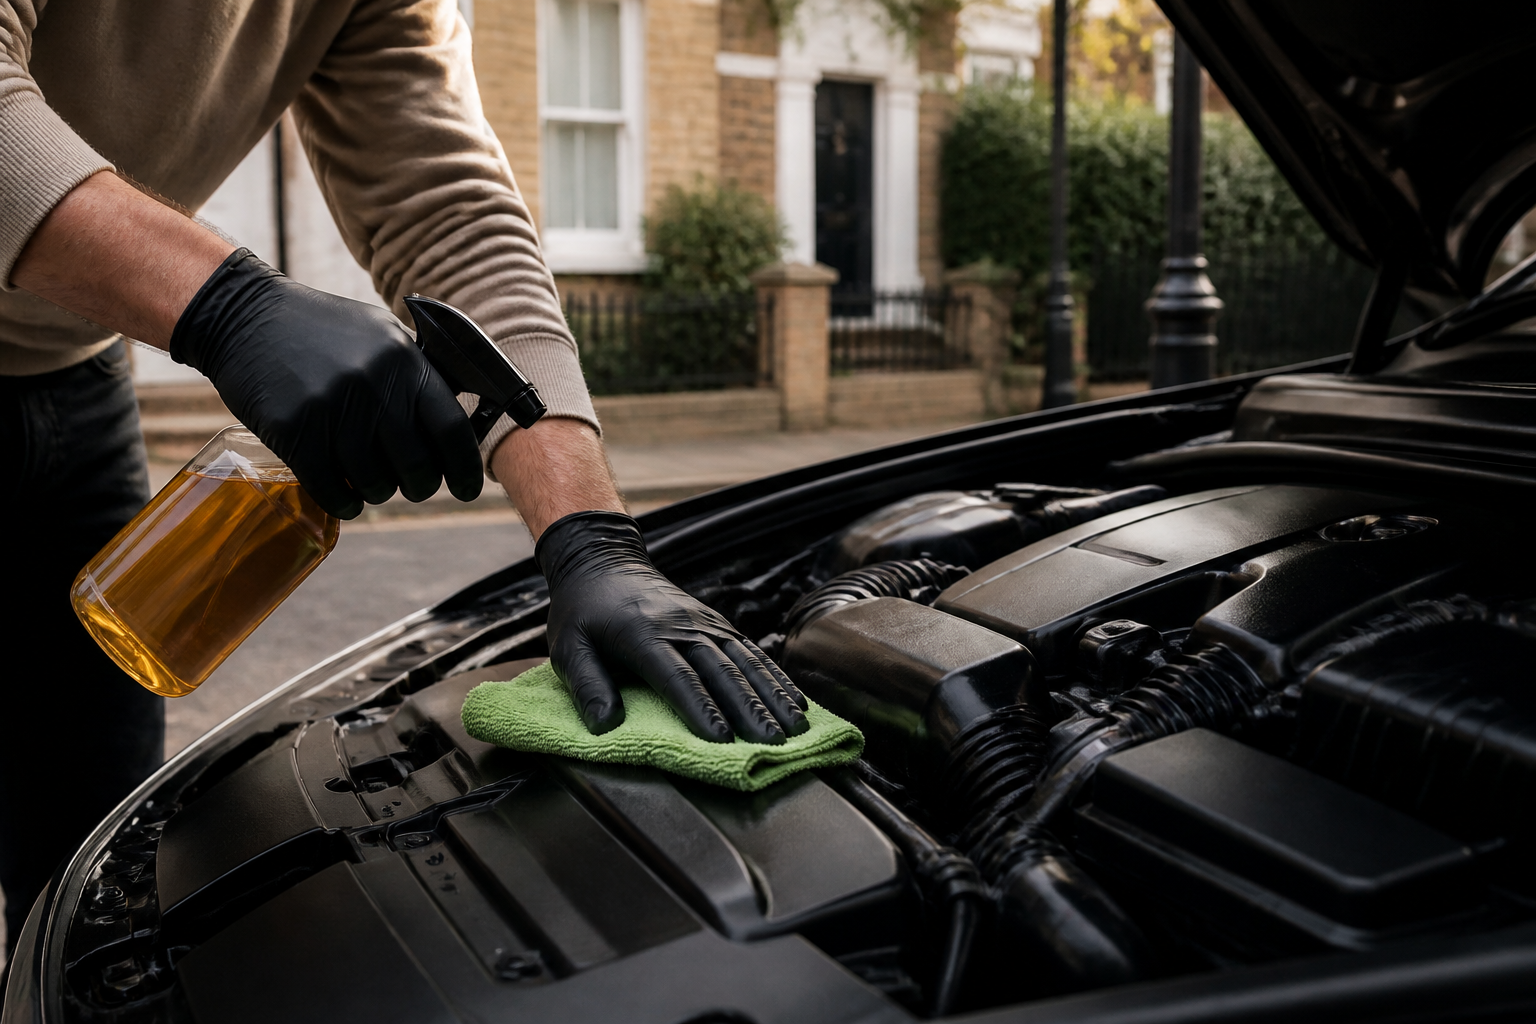
Step 5: Clean plastic covers and bay sides Many modern engines hide under large plastic covers. These are usually just clipped on and can be removed (consult your handbook). Wash plastic covers separately with diluted all-purpose cleaner and a soft brush. Rinse clean. This prevents degreaser from dulling the plastic finish. Wipe down the inner fender wells, the underside of the bonnet, and the bay sides with a microfibre cloth dampened with all-purpose cleaner.
Step 6: Dry completely This is the most important step. Water pooling in the engine bay causes corrosion and electrical issues. Use an air compressor or leaf blower to blast water from crevices, around hose connections, and from underneath components. If you don't have access to forced air, use multiple dry microfibre cloths to absorb as much moisture as possible. Leave the bonnet open for at least 30-60 minutes to air dry completely. On damp London days, consider running the engine (with bonnet still open) for 5-10 minutes to evaporate remaining moisture with engine heat. Do this only after removing all plastic coverings from electrical components.
Step 7: Dress plastics and hoses (optional) Once fully dry, apply a rubber and vinyl dressing to hoses, plastic covers, and rubber seals. Use a water-based dressing, not oil-based (which attracts dust). Apply sparingly with an applicator pad or cloth, not by spraying. Excess dressing attracts dirt and can fling onto your paintwork when the engine runs. This step is cosmetic but makes the bay look sharp and conditions rubber components.
Step 8: Reconnect battery and test Reconnect the negative battery terminal. Some modern cars may need windows re-indexed or systems reset (check your handbook). Start the engine and let it idle for a few minutes. Listen for unusual sounds. Check that all warning lights extinguish normally. Take a short test drive and verify that all electrical systems (lights, wipers, indicators, climate control) function properly.
Common mistakes to avoid Using a pressure washer: This is the number one cause of damage during engine cleaning. High pressure forces water past seals. The convenience isn't worth the risk. Cleaning a hot engine: Thermal shock can crack engine blocks, heads, and exhaust manifolds. Always wait for complete cooling. Skipping component protection: "I'll be careful" isn't a strategy. One splash into the alternator means an expensive replacement. Over-wetting the bay: More water doesn't mean cleaner. Use the minimum necessary. A damp microfibre cloth cleans many areas better than spraying. Forgetting to dry thoroughly: This causes more corrosion than never cleaning at all. Moisture trapped in connectors leads to electrical gremlins. Using household cleaners: Kitchen degreasers contain ingredients that can damage rubber hoses, seals, and painted surfaces. Use automotive-specific products. Rushing the process: Allow 60-90 minutes for a thorough job including drying time. Hurrying causes mistakes.
Cleaning frequency recommendations How often should you clean your engine bay? Light usage (under 5,000 miles/year): Once every 12-18 months Normal usage (5,000-12,000 miles/year): Once every 12 months Heavy usage (over 12,000 miles/year, motorway commuting): Every 6-8 months Taxi or private hire vehicles: Every 4-6 months (engine bays accumulate grime faster with high mileage) Before selling: Always detail the engine bay 1-2 weeks before listing your car London's roads throw up surprising amounts of oil, road salt (in winter), and organic debris.
Special considerations for modern vehicles Newer cars present unique challenges: Hybrid and electric vehicles: Never attempt DIY engine bay cleaning on EVs or plug-in hybrids. High-voltage systems require specialist knowledge. Even mild hybrids have electrical components throughout the engine bay. Professional cleaning is strongly advised. Turbocharged engines: Ensure the turbocharger has cooled completely (at least 2 hours) before introducing water. Turbos spin at extreme speeds and retain heat. Start-stop systems: These have additional electrical components and more sensitive batteries. Extra care with masking is essential. Extensive plastic covering: Many modern engines hide under large plastic panels. Cleaning visible plastic may be all that's needed for appearance. Removing covers requires care to avoid breaking clips.
When to use a professional service Some situations call for professional detailing- You own a hybrid or electric vehicle
-
You're uncomfortable working around car electrics
-
The engine bay has severe oil contamination from a leak
-
You're preparing a high-value car for sale
-
You lack the time or equipment for thorough drying
-
Your warranty specifically prohibits owner cleaning Professional detailers have heated drying equipment, specialized degreasers, and insurance covering any damage. The cost (typically £40-80 as an add-on to a full valet) is often worth the peace of mind.


